There are many ways to blocks unwanted websites on a Mac OS X. The first that comes into your mind might be the Mac built-in parental controls, which is perfectly easy to be done. Likewise, there are many methods to bypass the built-in parental controls. Only making use of the built-in parental controls is not far enough for your tech savvy child. Here, I will introduce several other free ways to block unwanted content on a Mac OS X.
Table of Contents- How to block websites on Firefox for Mac
- How to block websites on Google Chrome for Mac
- How to block websites on Safari
◆
How to Block Websites on Firefox for Mac
There is no in-built options to bock websites in Firefox for Mac. However, Firefox does have a large selection of extensions and add-ons to block the websites that you want.
1. Open Firefox browser, go to "Tools"-"Add-ons".
2. In this Add-ons page, search for "BlockSite". Click "Install" to continue installation. It will look like below:
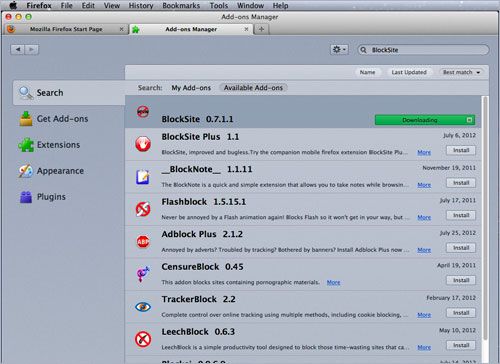
3. Click "Restart now" to finalize the installation process.
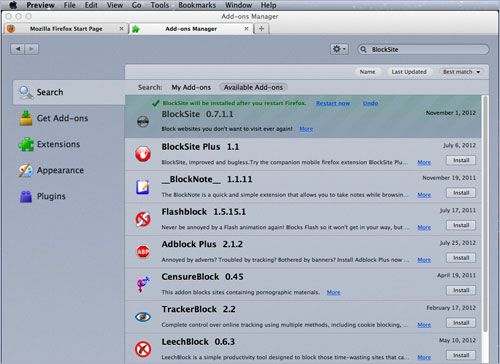
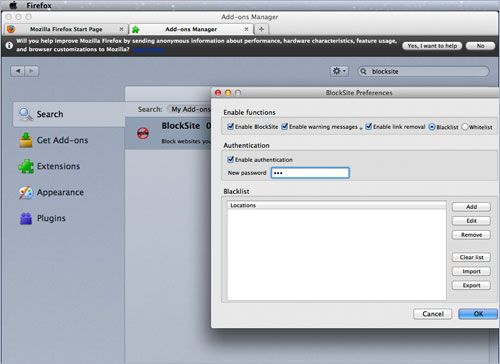
4. Go to "My Add-ons" and click "Preferences" to load the options.
5. In the "Enable functions" options, check the function options that you want to enable. If you want to set a password for the BlockSite, Check "Enable authentication" and then type a password in the "New password" box.
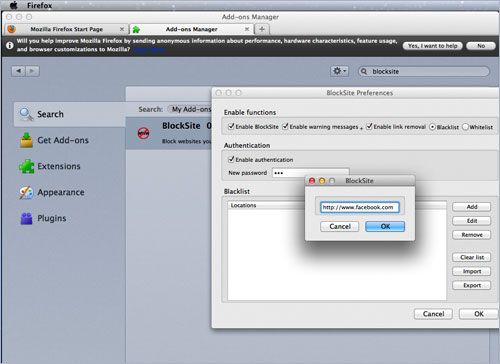
6. Click "Add" and then type in a website URL. Repeat this process with all websites that you want to block in Firefox. Then click "OK" to save changes. If you set up a password, you will be prompted to enter it every time you try to change the "BlockSite" details.
◆
How to Block websites on Google Chrome for Mac
Chrome Nanny is an extension for Google Chrome which can be used to block websites on OS X Chrome. You can set up white-lists, black-lists and more. It provides all the flexibility that you need so as to effectively use your time online and can be also disabled or uninstalled with a click.
1. Open Google Chrome browser. Go to this site
https://chrome.google.com/webstore?hl=en-US and search for Chrome Nanny. It will look like below:
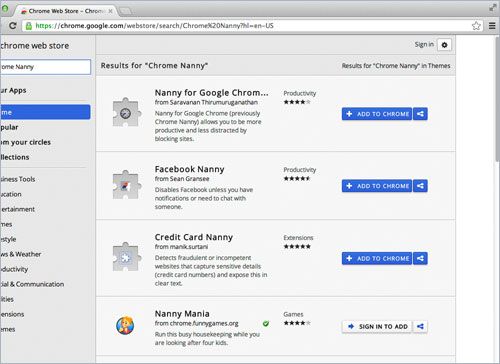
2. Right click "ADD TO CHROME" button, and click "add" to install.
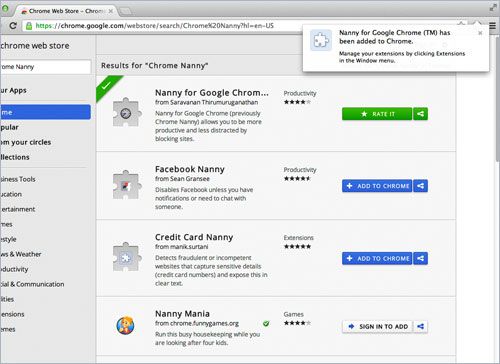
3. If you install it successfully, a small window will pop up, saying "Nanny for Google Chrome (TM) has been added to Chrome." You can see it like below.
4. Right click "Customize and control Google Chrome" button which looks like bold "三". Go to "Tools"-"Extensions".
5. Right click "Extensions" to load the extensions page.
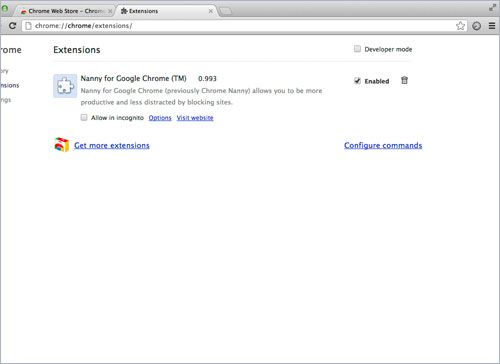
6. Check "Enabled", then click Options. Now it will look like below:
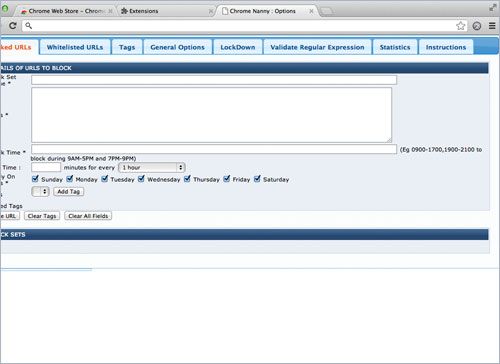
7. Add the URLs and names of the websites that you want to block in the "Blocked URLs" box, and then click "Save URL".
There are many options in Chrome Nanny. You can set it according to your own choices.
Notice: Browser like FireFox or Google Chrome has its own add-ons or extensions to block sites. However, no one works with Safari or the whole Mac system. Mac OS X has Hosts file just like Windows. We can also edit Hosts via Terminal on a Mac to block specific websites that you don't want to be accessed. Not only does it work in Safari, but also it works with the whole Mac system.
◆
Use Terminal to Block Websites on Mac
1. Click the "Finder," select "Applications," choose the "Utilities" folder and click "Terminal."
2. Type "cp /etc/hosts ~/Desktop/hosts.txt" (without the quotes) to copy your current hosts.txt file to the desktop as backup.
3. Type "sudo pico /etc/hosts".
4. Enter your Macintosh administrator password and press "Enter."
5. Use the arrow key to move the block cursor down to the bottom of the file and enter the IP address "127.0.0.1" followed by the domain name you want to block. This tells the computer that the address for that domain is now that IP number 127.0.0.1, which is your local Macintosh, and the browser won't be able to resolve that domain to a Web page.

6. Press "Ctrl-X" to exit after you have entered all the domains you wish to block. The domains need to be on separate lines. You will be prompted to save. Press "Y" for Yes.
7. Please run the following command in Terminal to take the changes take into effect:
a. If you are using Mac OS 10.4.X, please type the following and press Enter:
lookupd –flushcache
b. For Mac OS 10.5.X and later, it can be done by entering the following and press Enter:
sudo dscacheutil –flushcache

8. Click the Terminal menu and select Quit Terminal to exit.
9. Open Safari and type in the domains you blocked in the hosts file. All other browsers on your machine will be blocked from accessing that domain as well. You can enter as many domains as you want into the hosts file, but put each command on a new line and remember this action blocks them from all users of the computer, including you.
We can block any sites we don't allow to on Mac by modifying the host file. However, we do not recommend this way if you are not proficient at Mac.
Most of the ways above can only block site one by one. If you want to block **** content in large scale, such as blocking sites by keywords, you may need a professional filter, like the Mac website blocker. It has more options then free ways and It is quite easy to use.