If you are fed up with the same name of the Recycle Bin or you want to show off in front of your friends, there is no better way but to rename it. There are two ways how to do it:
The first way:
Click on
Start, then
Run, enter
regedit in the text field and press OK. Expand (click on the plus (+)) on the
HKEY_CLASSES_ROOT folder. Scroll down to the
CLSID folder and expand it. Next you have to scroll down a little bit more than previous in order to find the
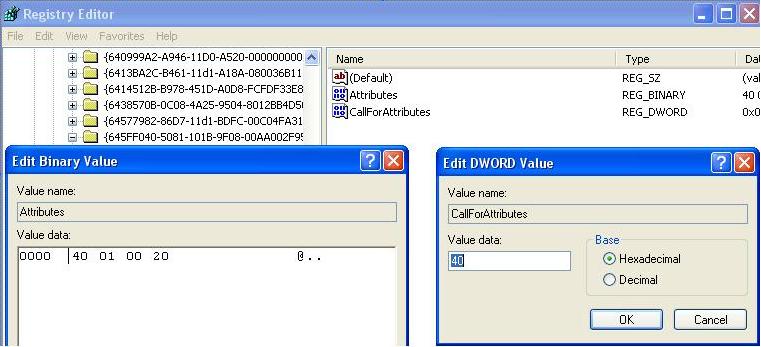
{645FF040-5081-101B-9F08-00AA002F954E} folder. Expand it and click on the
ShellFolder. Click twice with the first button of the mouse on
Attributes, which can be found on the right side. Change the data value from
40 01 00 20 to
50 01 00 20. After that, click twice on
CallForAttributes and change the value data to
0.

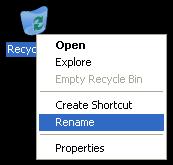
When you complete this, you’ll be able to rename the Recycle Bin like any other folder (right click on it and rename it).

The second way:
Click on
Start,
Run, type
regedit again and press OK. In the Registry Editor go to
HKEY_CURRENT_USER and expand it. Go to
Software and expand it. Scroll down to find
Microsoft and expand it again. From there go to
Windows and then expand the
ShellNoRoam in order to find
MUICache. In it search for
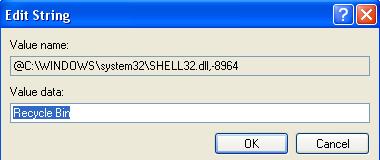
@C:\WINDOWS\system32\SHELL32.dll,-8964 and double click on it.

Enter the name that you would like to use instead of Recycle Bin and click OK.

Close the Registry Editor and go to the Desktop, click on it and press F5 to refresh it. You’ll see the Recycle Bin renamed with the new name.
